How to set Black and White points in Lightroom 4
Setting the black and white point is very critical to bring out the correct exposure of the photo, especially when you are shooting in raw format. Many of the amateur photographers find it difficult to set the same.
Now, let us see how to set the black and white spot using Adobe’s Lightroom 4 on Mac or a windows pc.
Open Lightroom on your windows pc or mac. Import the picture you want to edit. Click the Develop module option seen on the top right corner to start editing.
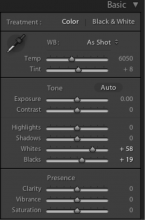
In the Basic editing options on the right side you can find the “Whites” and “Blacks” option.
First we will see how to set the white point. Hold the alt key on your keyboard and drag the Whites slider to the right side until you see some white patches on the fully black photo.
Bring the slider to little left until the white turns to black completely. Now you have captured all the white details in your picture without missing any
Now, we will see how to set the “Blacks”.
Just like the Whites slider we need to move the Blacks slider holding the alt button in the keyboard. Here you need to move the slider towards left side. Initially when you hold and move the slider you can see fully white picture. Once you reach a particular limit then you can see some dark colored spots appearing in the picture. You need to stop dragging it to the left side just before that. Now, you have set the blacks too. By doing this you have brought the missing dark details out of the picture.
See the difference between the before and after setting the Whites and Blacks in the snapshot below.


